The Compensation tab
The Compensation tab allows the management of the compensation items used in the Compensation data set.
You manage compensation elements if your company has decided to use the compensation data model available in Core HR. If in doubt, please contact the support.
It is separated into two structures:
the Theoretical structure: this structure contains four non-modifiable system categories (Benefits, Allowances, Bonus, and Base Salary), themselves divided into several fields called Section, which can be fully customised to suit tour needs.
the Pay structure: this technical point is not covered in this guide.
Please note that:
two configuration modes are possible on your environment: the Salary Review module can use the data contained in the Administration module or in the Core HR module, but it cannot use both at the same time.
If the first case is active, the data contained in the Compensation tab is not copied to the Administration module, it is managed solely in Core HR.
If the second case is active, the Salary Review module will retrieve the Categories and Sections set up in the Compensation tab, display them in the Administration module and display the employee data in the data entry grid.
the Compensation data set is the only data set for which you determine, by template, the Sections available to users (employee file, events, self-service).
Sections must be activated in a template to be available in the employee file.
A Category that does not have an active Section in a template will not be displayed in the Compensation data set.
You have access to the Compensation tab is your administrator role has been assigned the following rights:
Module | Sub-module | Right | Description |
|---|---|---|---|
Administration | Administrative management | Access: Compensation settings | Enables you to access the Settings > Compensation menu |
Administration | Administrative management | Edit compensation elements settings | Enables you to edit the information in the Settings > Compensation menu |
The Theoretical structure includes the four system categories on the left and the sections for each category on the right, with a colour:
green: the section is active;
grey: the section is inactive;
yellow: the section is set up with availability dates. As long as the availability start date has not passed, the section appears in yellow, by ticking the Show inactive sections option. It will turn green as soon as the date has passed.
Each Category / Section combination is referred to as a Compensation item.
To create a compensation section, from Core HR:
Click on Settings on the left side panel.
Click on the Compensation tab.
Click on the category in which you wish to add a section:
Benefits: amount, service or object used or exchanged for money that the employee receives as part of their contract;
Allowances: amount paid to an employee to help them fulfil their contractual obligations;
Bonus: period-based payment linked to a salary, performance, commission, etc.;
Base salary: regular payment made to the employee.
Click on
 > Create a new section.
To edit an existing section, click on
 > Edit section.
Fill in the information in the section.
Click on Save as new to save your changes.
When editing, the button is labelled Save.
Activate your section in the templates so that it is visible in the employee files by following the procedure in the following article: Managing templates.
You can delete compensation sections only if the section has not already been added to templates and is not already used in employee files.
If you no longer want the section to be available when editing templates, change its status to Inactive: in this case, the field in instantly unavailable when editing templates and in employee files.
If the section has already been used for an employee file, it remains visible but cannot be modified in the file concerned.
To delete a compensation section, from Core HR:
Click on Settings on the left side panel.
Click on the Compensation tab.
Click on the category in which you wish to delete the section.
On the relevant section, click on
> Delete.If you can't find the section, activate the Show inactive sections option.
In the pop-up window that appears, click Validate to confirm the deletion.
Each section contains a certain amount of information, as detailed below:
Property name | Explanation |
|---|---|
Short name | Name for the compensation section (max 50 characters) as it appears in Core HR. |
Full name | More detailed name for the compensation section (max 250 characters) that appears to Core HR administrators during template configuration. |
Code | Unique identifier for the compensation section, mainly used for imports, exports, and APIs. |
Status | Section status:
|
Definition | Additional information on the compensation item: this is displayed by hovering over the item in the Settings > Compensation menu, in the configuration of a template or in the form of a tooltip The definition can be translated by import in the Administration module. |
Frequency | Frequency at which the employee receives the compensation section: the list depends on a library managed by Cegid HR. |
Availability start date | Date from which users can select the section in the employees files. It is possible to activate the section in templates before this date. |
Availability end date | Date until when the users can select the section in the employees files. |
Eligibility | Allows you to restrict the section to eligible employees, depending on the library node selected. |
Linked library | Drop-down list of Compensation & Benefits libraries to which you can link the section for eligibility. |
Select the Compensation & Benefits node | Drop-down list of nodes in the Compensation & Benefits library selected for eligibility. |
Base Unit | The form the compensation takes for the employee, either Amount, Percentage, or Number of units If eligibility has been activated, this field is greyed out and the value will automatically be that indicated in the selected Compensation & Benefits library. |
Indexed with | Allows you to index the section to another section (any category). Valid only if the values Percentage or Number of unites have been selected in the field Base unit. If eligibility has been activated, this field is greyed out and the value will automatically be that indicated in the selected Compensation & Benefits library. |
Salary type Source Taxes Contributions Incentive type | Tags that appear for informative purposes in a hover-over box, both in the Compensation tab and during template configuration. If you are unsure, leave as Undefined. |
| Button for copying the compensation section Code (only available when viewing the section details). |
Category | Reminder of the section category (only available when viewing the section details). |


The Eligibility property allows you to manage specific compensation policies by creating links between compensation sections and Compensation & Benefits libraries.
It will label the employee file as being eligible for a compensation section and specify the exact element for which the employee is eligible, as well as its value.
If you activate the Eligibility option in a section, when you select it in employee files:
the frequency of the section will be that defined in the menu Settings > Compensation;
the amount, currency and base unit are those defined in the selected library node: this information is pre-filled and cannot be modified in the file.
When you activate the Eligibility option in a section:
The Linked library field is activated: here, you need to define the library for the category Compensation & Benefits on which your section will depend.
Once the library has been selected, the Select the Compensation & Benefits node is activated: this allows you to define the library node to which the section is linked.
If the selected node does not have a child node, it will be selectable from an employee file.
If it has child nodes, only these can be selected.
The Base unit and Indexed with fields are set to inactive because this data is taken from the configuration of the selected node.
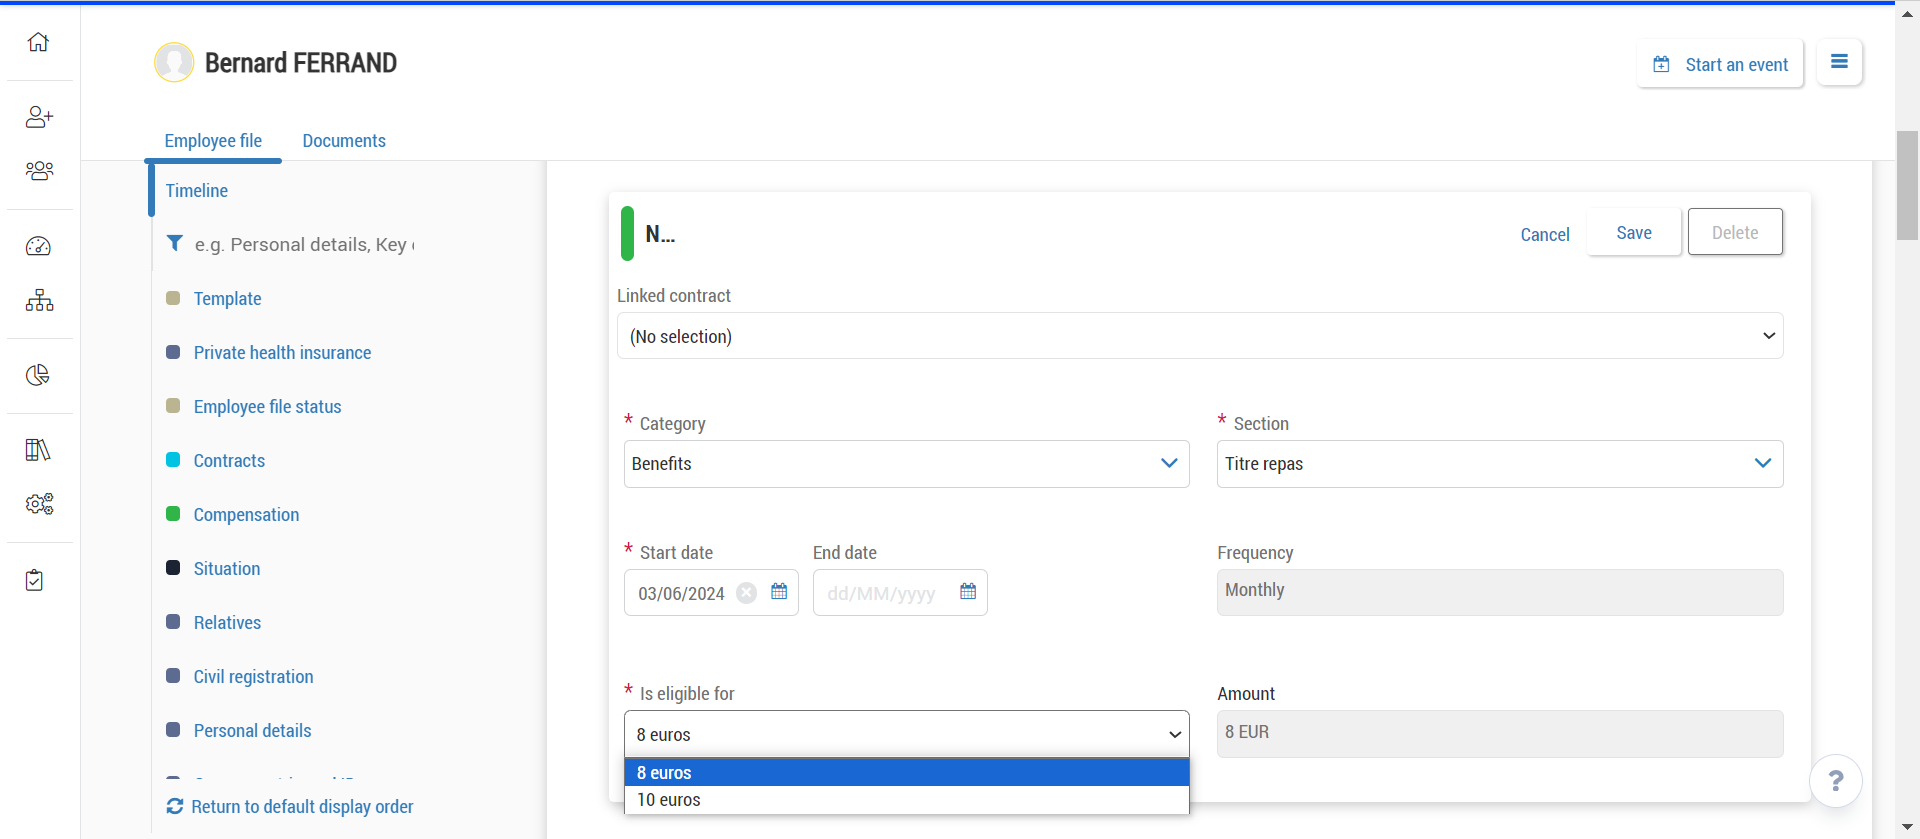
In the example below, the employee is eligible for two levels of meal voucher pricing, by selecting the parent node of the associated repository.