The exports page
The Export page allows you to export the data of your employees by data set in a simplified way, with the application of filters and according to specific dates.
It contains two tabs:
Data sets which allows you to prepare and launch your export
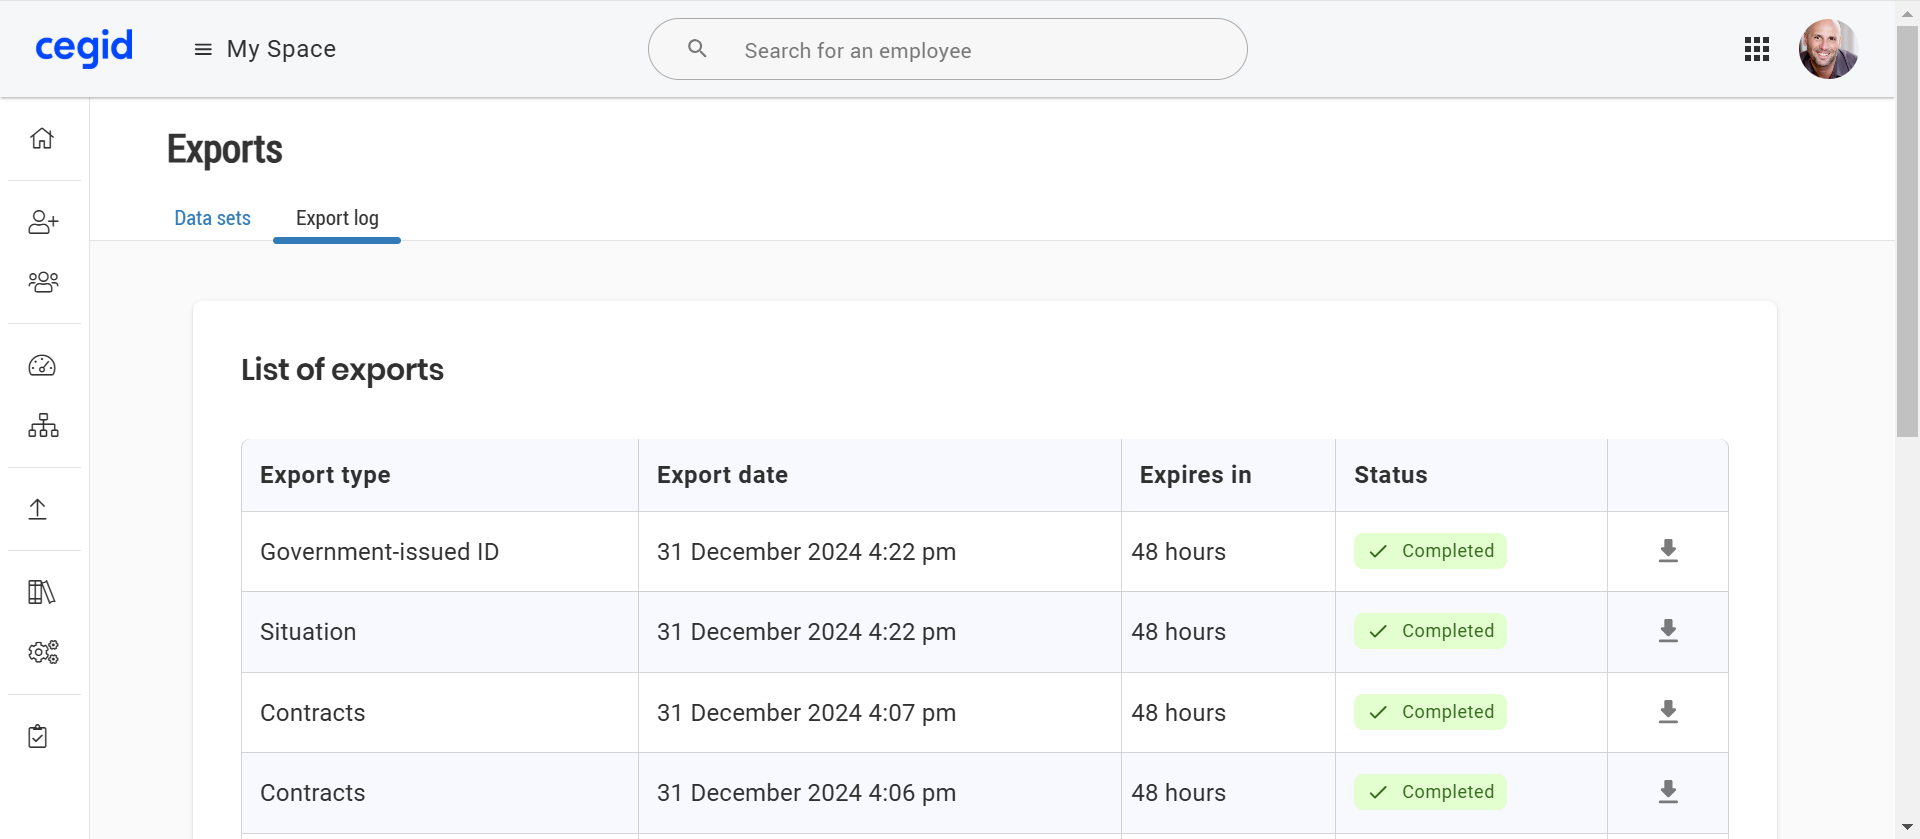
Export log which allows you to download exports from the past 48 hours
Important information:
Your rights and authorisations are taken into account on this page:
You can export only the data sets that you have access to.
You can export only the data of employees within your authorisation area.
Filters are combined with an operator “AND”, that is, all conditions must be met, for example:
“Is in the authorization list” AND “Active (if the box is checked)” AND “Belonging to the search list (if selected)”
Exports of data sets Contracts and Situation are compatible with the following two imports:
[HUB] Create/Update contracts (by row)
[HUB] Create/Update situations (by row)
The exported file will be separated by commas or semicolons according to the language of the company (technical information defined during the project phase).
To perform an export, from the Core HR module:
Click on the
 Exports menu.
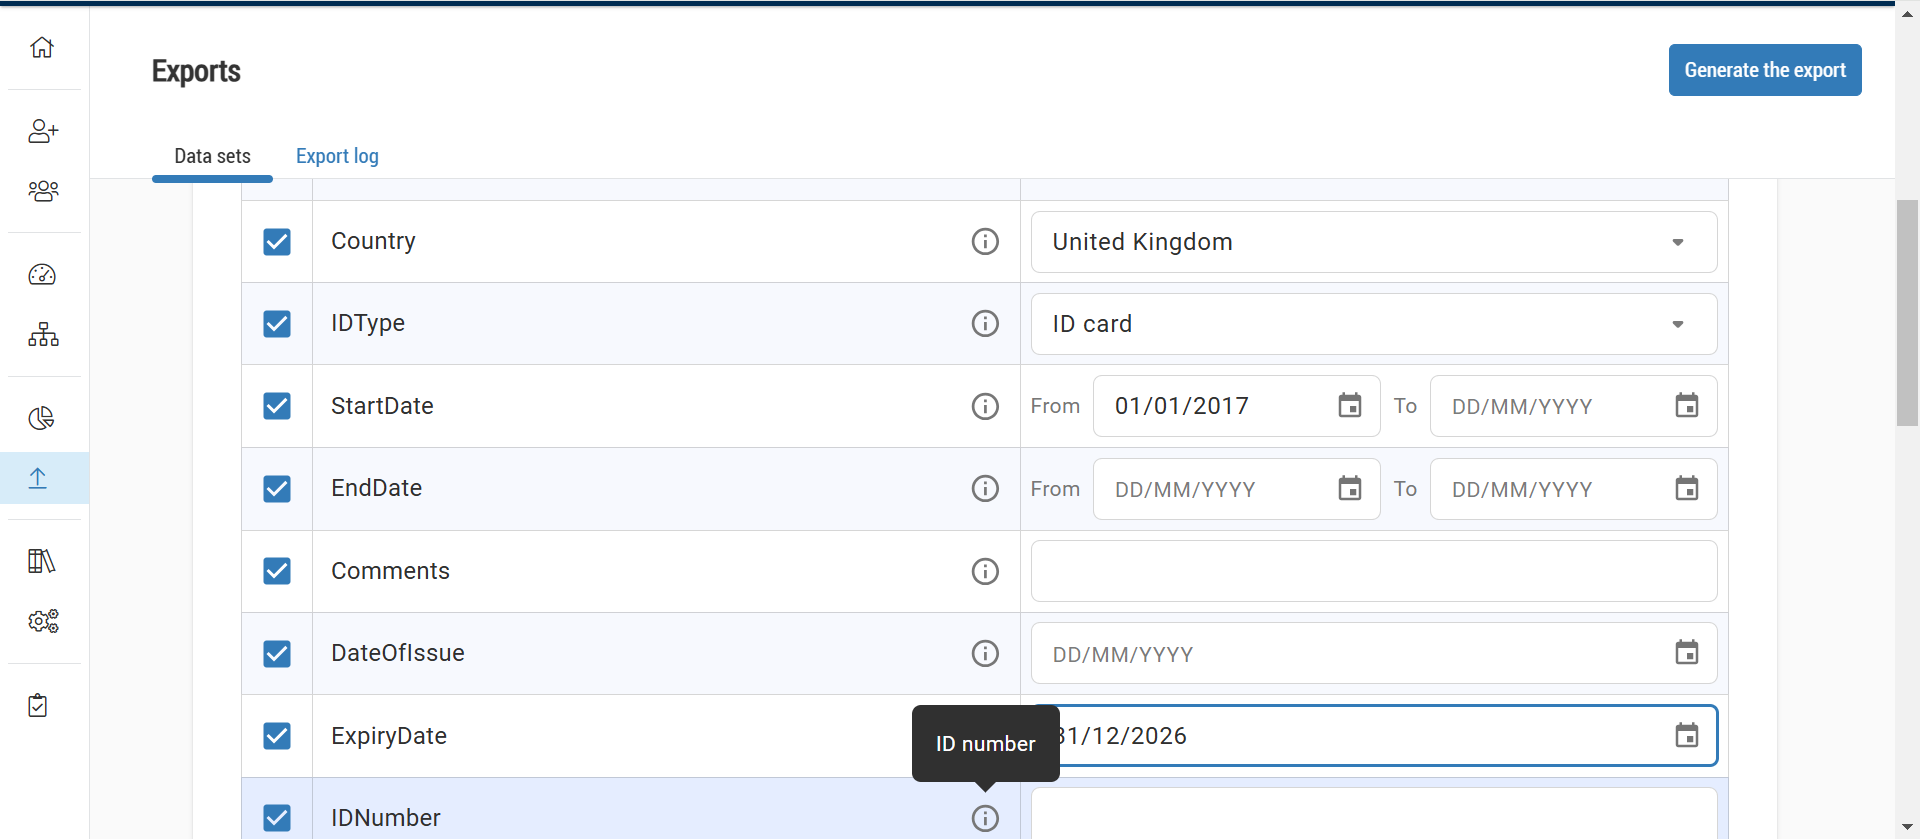
Select the data set you want to export from the dropdown list.
By default, employees are identified by their employee ID: select the option Add the employee's last name/first name to the export to also have their first and last name in a dedicated column.
In the block Columns, check or uncheck the data to be exported according to your needs: a tooltip
 allows you to see the field name.
For each data, you can add a filter:
On a Text field: the export will filter on the exact value entered (emphasis is taken into account, case is not).
On a Date field: enter a date range or only a start date and/or an end date.
On a Boolean field: choose the value Yes or No.
On a List field:
If the list is from a library, specify the node code to be filtered: only employees whose data corresponds to the exact node are considered.
If the list is a system list, choose a value in the dropdown list.
In the Selection of records block, select one of the options to export:
All recordings
Current recordings only
Recordings modified over the last X days
In the Employee selection block, you can filter the employees concerned by the export according to:
Their status, active or not: the start date is earlier than or equal to today and the end date is in the future, or not specified.
From an existing search list.
Click on Generate the export at the top right of the page once your filters are set up: the file will be downloaded automatically.
If you left the page before generating your file, you can find it for 48 hours from the tab Export log, and download it by clicking on
.