The Personal information tab
The Employee Self-Service is an option that allows employees to modify directly their information from their personal space, without asking the HR staff. They can also add document to some data sets.
The Employee Self-Service is configurable to select available fields for modification and to add a step of validation by HR staff.
All modifications are traced and dated to keep a precise history.
For the Self-Service without validation, employees can choose to either edit current information or to update it to a later date, but they can't delete their request. It is not an update request to HR staff but a direct update in the employee file. In Core HR, this respectively imply the modification of the current record or the creation of a new record.
For the Self-Service with validation, employees can update their information to a certain date and can delete their request. In Core HR, each modification request creates a new record on the updated data.
In this case, HR staff is notified of the modification request, and the action of validation email the employee to confirm the saving of the new data.
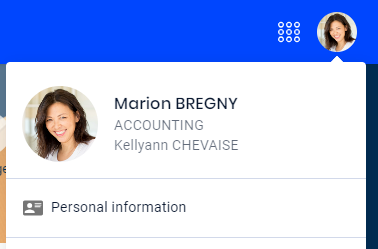
Please note that the term Self-Service does not appear in the Core HR interface: the access is by clinking, on the Cegid HR homepage, on the profile picture on the top right, and then on Personal information.
 |
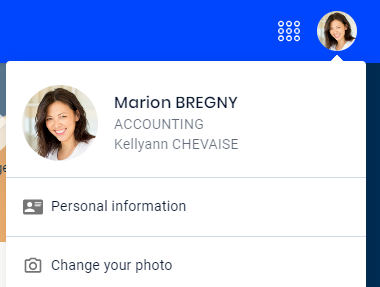
To add or modify their profile picture, employees have two solutions:
From the Cegid HR homepage, they click on their picture on the top right, and then on Change your photo.
From the Cegid HR homepage, they click on their picture on the top right, then on Personal Information. They can then click on their picture from their personal space.
 |
Employees can edit their current information and add future information (they can't edit past information), for data defined by their company.
Depending on the data set, they will add new information or update current information. In some cases, no information has been entered by HR staff and employees can add information for the first time.
In the case where data can be edited, several cases might happen:
The data set is empty, it is up to the employees to add the first information.
The data set has information and does not have subsection: employees will update the information displayed.
The data set has information and has subsections: employees can decide to either update the information displayed or add a new subsection.
From the Personal Information menu:
Find the data set to update, the message Add more information to this data set is displayed: click on
 on the right of the section.
Enter the date when modifications are effective, you can't enter a date in the past.
Fill in mandatory fields.
Click on Save as new or Submit depending on the validation system.
From the Personal Information menu:
Find the data set to update and click on
 on the right of the data set to show information.
If you want to:
Edit your information, because they are incorrect, and you don't have a validation step with the HR staff: keep the Current date selected and click on Edit.
Edit your information, because it has changed, or it will change, and you don't have a validation step with the HR staff: click on
 Add date.
Edit or update your information and there is a validation step with the HR staff: click on Make a change.
Enter the date when modifications are effective, you can't enter a date in the past.
In some cases, the field When will the change take effect? is not displayed as it doesn't make sense, for example for the Civil registration data set.
Fill in mandatory fields.
Click on Save, Save as new or Submit, depending on the validation system.
From the Personal Information menu:
Find the data set to update and click on
on the right of the data set to show subsections.If you want to add a new subsection, click on
on the top right of the data set.If you want to:
Edit your information, because they are incorrect, and you don't have a validation step with the HR staff: keep the Current date selected and click on Edit.
Edit your information, because it has changed, or it will change, and you don't have a validation step with the HR staff: click on
Add date.Edit or update your information and there is a validation step with the HR staff: click on Make a change.
Enter the date when modifications are effective, you can't enter a date in the past.
In some cases, the field When will the change take effect? is not displayed as it doesn't make sense, for example for the Qualifications data set.
Fill in mandatory fields.
Click on Save, Save as new or Submit, depending on the validation system.
If your administrator has given you the right to do so, you can add a document from your personal space via a generic add button in the top right-hand corner of your space.
To add a document:
From your personal space, click on Upload a document on the top right.
Select the type of document to add and click on Select.
Place your document in the dedicated insert or click Upload to select it from your computer.
Click on Confirm on the top right to add your document.
Prerequisite: enter your information about the document into the relevant data set before uploading the document.
To upload a document to a data set, by editing it:
From the Personal information tab, find the data set to update, click on
to expand the data set and the subsection if needed.Click on Make a change.
At the bottom of the data set, click on Upload or drop a file on the insert.
The addition of the file may be mandatory for a data set, in this case, a message is displayed above the insert.
Click on Submit or Save, depending on the validation mode.
From the Personal Information menu:
In the relevant data set of the Personal Information menu, click
to expand it, if it is collapsed.Scroll down the data set until you see the Document(s) table.
Find the relevant file in the list of documents and, from the Actions column, click on
 > Delete.
The document is permanently deleted from Core HR and disappears from the Documents table in the data set. This means your HR department can no longer view or retrieve the document.
From the Personal Information menu:
In the relevant data set of the Personal Information menu, click
to expand it, if it is collapsed.Scroll down the data set until you see the Document(s) table.
Find the relevant file in the list of documents and, from the Actions column, click on
> Download.